

How To Change Label Text In Python
Text or a picture can be shown on the screen using the Tkinter label widgets. Simply one typeface tin be displayed on a label. Multiple lines of text are possible. A characterization tin include any text, and a window can comprise many labels (just like any widget can be displayed multiple times in a window). Yous can hands modify/update the Python Tkinter characterization text with the label text property. Changing the characterization's text belongings is another style to modify the Tkinter label text. This lesson will look at modifying label text when a button is clicked in Tkinter Python.
Labels in Tkinter
Python provides several alternatives for creating a graphical user interface. Tkinter is the most widely used GUI technique out of all the options. Using widgets, creating a GUI with Tkinter is uncomplicated. Widgets, such equally buttons and menus, are mutual graphical user interface (GUI) elements.
Tkinter Characterization is a widget that lets you make text or graphics-based display boxes. At any time, the developer has the power to change the text displayed by this widget. It tin also be used to execute operations similar underlining text and spanning text across numerous lines.
It'south vital to think that a label can only brandish text in i typeface at a time. All y'all must do to apply a label is tell it what to display (this tin exist text, an paradigm, or even a bitmap). Permit's take a wait at some sample programs to see how y'all can update the characterization text.
Example 1:
Tkinter is used in the following Python script to produce a window with the text "Hullo Earth." You may either blazon this script line by line in the Python interpreter or salve it as a file. The Tkinter module, which contains the Tk toolkit, must exist imported at all times. We first imported the Tkinter module past renaming it to tk in our example below. It is the preferred method that all programmers should follow.
Tkinter is the main window with a title bar and other options the window director provides. Only i root widget tin can exist generated, and it must be established before whatever additional widgets.
The Characterization widget is plant on the next line of code after the root widget. The name of the parent window, in our instance "root_mthd," is the first parameter of the Label function. Resultantly, the Label widget descends from the root widget.
The text to be shown is specified by the keyword argument "text." Tk uses the pack function to resize the window to fit the specified text. Nosotros won't see the window until we've entered the Tkinter event loop. Our script will stay in the event loop until nosotros close the window.
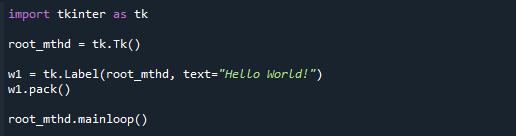
import tkinter as tk
root_mthd = tk.Tk ( )
w1 = tk.Label (root_mthd, text= "Hello Globe!" )
w1.pack ( )
root_mthd.mainloop ( )
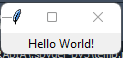
After you've saved and run the script, you'll get the following results.
Instance ii:
The Label.config() method is used in this case. This method is used to exercise a characterization widget overwriting. We used # to import everything from Tkinter and and then created the Tkinter window in the code. Afterwards declaring the variable, we divers the part and wrote the code to update the characterization. Information technology'south fourth dimension to make a button and a label widget. The widgets were then placed in the GUI window, and the GUI was started. The whole lawmaking can be found beneath.
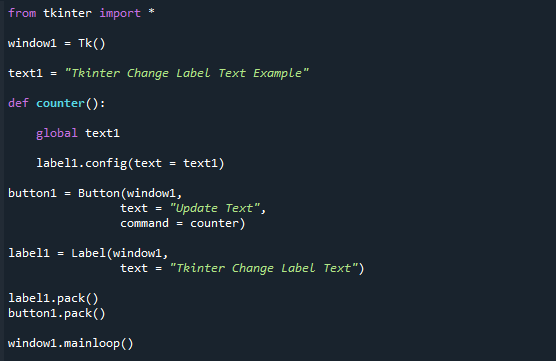
from tkinter import *
window1 = Tk( )
text1 = "Tkinter Change Label Text Case"
def counter( ):
global text1
label1.config (text = text1)
button1 = Button(window1,
text = "Update Text" ,
control = counter)
label1 = Label(window1,
text = "Tkinter Change Characterization Text" )
label1.pack ( )
button1.pack ( )
window1.mainloop ( )
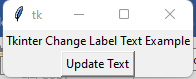
Y'all can run across the label and the button in the post-obit output screen.
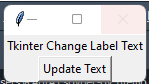
When we click on the push button, the label is successfully updated, as yous can come across.
Example iii:
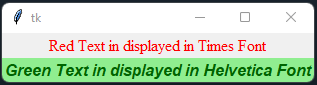
Y'all can select the typefaces used to display text in some Tk widgets, such equally the label, text, and canvas widgets. This is ordinarily accomplished using a "font" configuration pick. It's important to remember that typefaces are i of few areas that aren't platform-doubter. The aspect "fg" can be utilized to change the text color. On the other hand, the attribute "bg" can be utilized to modify the label's background color.
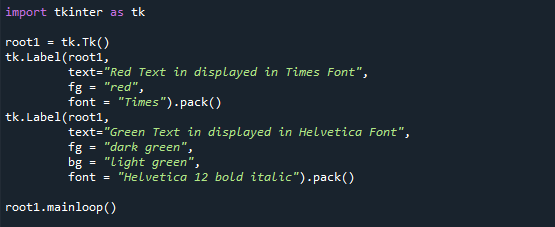
import tkinter as tk
root1 = tk.Tk ( )
tk.Label (root1,
text= "Carmine Text in displayed in Times Font" ,
fg = "cherry-red" ,
font = "Times" ).pack ( )
tk.Label (root1,
text= "Green Text in displayed in Helvetica Font" ,
fg = "nighttime green" ,
bg = "light green" ,
font = "Helvetica 12 bold italic" ).pack ( )
root1.mainloop ( )
Here's what the above code produced in terms of colorful text.
Example 4:
Here's a unproblematic example of how to change/update the Tkinter label text using stringvar. StringVar is a type of Tkinter co-constructor that creates a string variable in Tkinter. When we connect with Tkinter widgets, Tkinter will modify this item widget when the StringVar variable is updated.
The string variable could not be started with the string cocky.t_text = tk.StringVar in the Tkinter constructor. To gear up the StringVar value, we should utilize the set method, such equally self.t_text.fix ("Test").
Past setting textvariable to cocky.t_text, it connects the StringVar variable (self.t_text) with the label widget indicated as self.l_label. If self.t_text is changed, the Tk toolkit starts tracking the changes and updates the text cocky.l_label. A Tkinter dynamic label is created with the code above. When cocky.t_text is changed, it displays the Tkinter label text immediately.
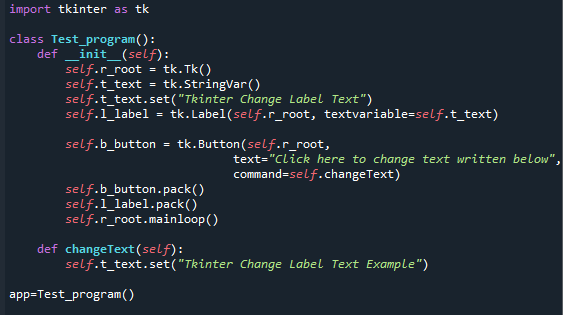
import tkinter every bit tk
class Test_program( ):
def __init__ ( cocky ):
self.r_root = tk.Tk ( )
cocky.t_text = tk.StringVar ( )
self.t_text.set ( "Tkinter Change Label Text" )
self.l_label = tk.Label ( cocky.r_root , textvariable= cocky.t_text )
self.b_button = tk.Button ( self.r_root ,
text= "Click here to change text written below" ,
command= cocky.changeText )
self.b_button.pack ( )
self.l_label.pack ( )
self.r_root.mainloop ( )
def changeText( self ):
self.t_text.set ( "Tkinter Change Label Text Case" )
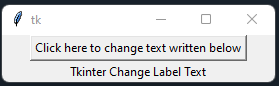
app=Test_program( )
Here yous can view the resultant screen.
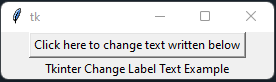
By clicking on the button, it successfully updated the text from 'Tkinter Change Label Text' to 'Tkinter Change Label Text Example.'
Conclusion:
Tkinter Label widgets are commonly used in applications to bear witness text or images. You can change the label widget's text holding, color, background, and foreground colors using different methods. You tin can update the text of the label widget using a push button and a office if you demand to tweak or alter it dynamically. And we've illustrated this concept with examples in this post.
Near the author
Hullo, I am a freelance writer and usually write for Linux and other technology related content
Source: https://linuxhint.com/change-label-text-tkinter/
Posted by: marinohaductincer.blogspot.com
0 Response to "How To Change Label Text In Python"
Post a Comment